

Unlocking the Hidden Path to a Safer Home: A Journey into Dryer Vent Maintenance
In the quiet corners of our homes, behind the scenes of laundry days and warm, freshly dried clothes, lies a humble yet crucial component—the dryer vent. Often overlooked, this unassuming conduit plays a pivotal role in our daily lives. But like any unsung hero, it requires attention, care, and a touch of DIY magic to keep it functioning optimally.
1. Signs of Lint Buildup: The Silent Culprit
Before we embark on our DIY adventure, let’s decipher the cryptic signs that hint at a clogged dryer vent. These subtle whispers often go unnoticed, but they hold the key to preventing potential disasters:
- Longer Drying Times: If your laundry seems to linger in the dryer longer than usual, blame it on restricted airflow caused by lint buildup.
- A Burning Smell: A faint scent of burning during drying cycles? It’s not your imagination—it’s a warning sign. Lint or debris trapped in the vent can overheat and ignite.
- Excessive Lint in the Lint Trap: While some lint is expected, an unusually large amount signals trouble. Clogged vents prevent proper lint escape.
- Hot Dryer Exterior: A touch of the dryer’s surface reveals more than warmth—it hints at a vent struggling to breathe.
- Mid-Cycle Shutdowns: Does your dryer play hide-and-seek during cycles? Overheating due to vent blockage triggers safety mechanisms.
2. The DIY Toolkit: Your Allies in Vent Liberation
Fear not, intrepid homeowner! Armed with a few essential tools, you can conquer lint and restore your vent’s vitality:
- Vacuum with a Long Hose Attachment: Your trusty vacuum becomes a partner in this quest. Its elongated hose reaches deep into the vent.
- Dryer Vent Brush Kit: This specialized brush kit, designed for vent cleaning, dislodges lint and debris.
- Screwdrivers: Unscrew clamps and access points with ease.
- UL-Listed Metal Foil Duct Tape: Seal any gaps or leaks securely.
3. The Journey Begins: Unmasking the Vent
- Locate the Vent: Begin where the duct begins—the short 4-inch diameter exhaust at the back of your dryer. This connects to the ductwork via an aluminum elbow.
- Safety First: Unplug the dryer or turn off the gas/propane valve. For gas dryers, tread carefully around the gas line.
- Vent Pipe Liberation: Free the vent pipe from its shackles. Remove clamps or metal tape, allowing you to pull the pipe away from the wall duct.
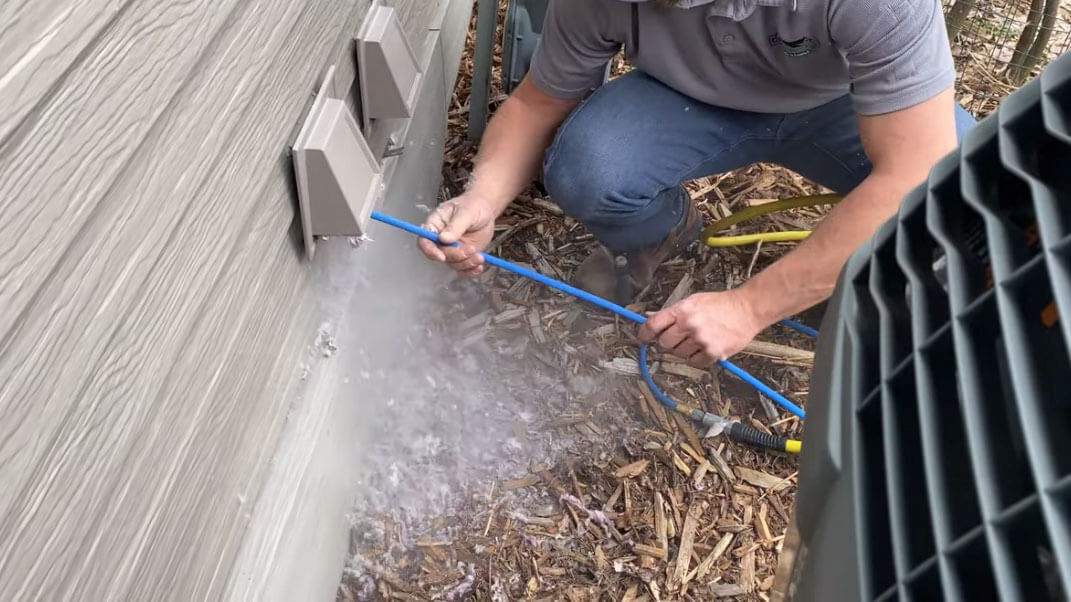
- Vent Brush Magic: Assemble your vent brush kit. Insert the brush into the ductwork and spin it counter-clockwise. Push it as far as possible to dislodge lint and debris. Add segments if needed.
- The Great Exit: Remove the duct cover outside, granting full access to the entire ductwork. Clean thoroughly.
4. The Triumph of a Clean Vent
Your efforts aren’t in vain. A clean dryer vent ensures:
- Safety: No more fire hazards lurking in the shadows.
- Efficiency: Faster drying times, lower energy bills.
- Peace of Mind: Your home breathes easier.
Remember, fellow adventurer, the path to a well-maintained dryer vent lies within your grasp. So, roll up your sleeves, wield your tools, and embark on this DIY odyssey. Your home—and your laundry—will thank you.